Recent Updates Toggle Comment Threads | Keyboard Shortcuts

  • cubie 4:40 pm on June 16, 2012 Permalink | Reply
    Tags: "Samsung Galaxy Tab",   

    DIY a LEGO micro SD card reader for Samsung Galaxy Tab 

    Editor: Jim kajpust

    The first generation of the Samsung Galaxy Tab series don’t have a microSD slot. Although the Galaxy Tab provides an USB On-The-Go (OTG) function for users to connect USB joypad, keyboard ,mouse, thumb drive,… But it equip a custom 30 pins serial data connector, so the users have to buy a special 30pin to USB port connector to connect USB devices.

    Here is the pinout of the 30 pins connector (image courtesy of Droid Angel):
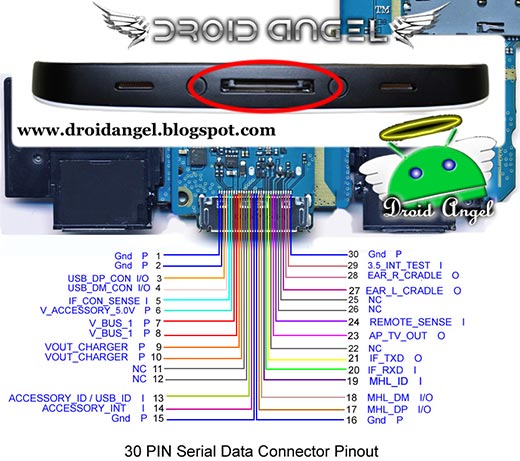
    pinout of the Samsung Galaxy Tab 30 pins connector

    Below is the USB OTG cable for Samsung Galaxy Tab, attached a tiny USB micro SD card reader:
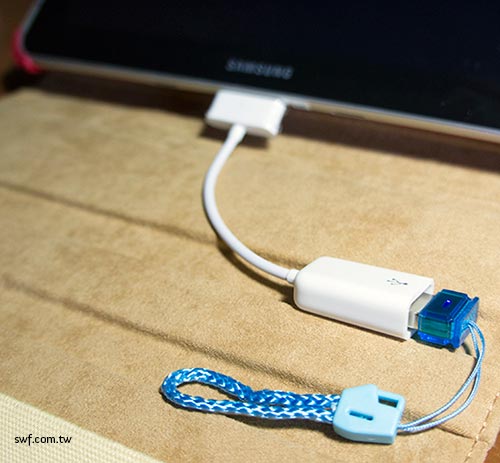
    USB OTG cable for Samsung Galaxy Tab, attached a tiny USB micro SD card reader

    And a picture of a 5-in-1 USB memory card reader for Galaxy Tab:
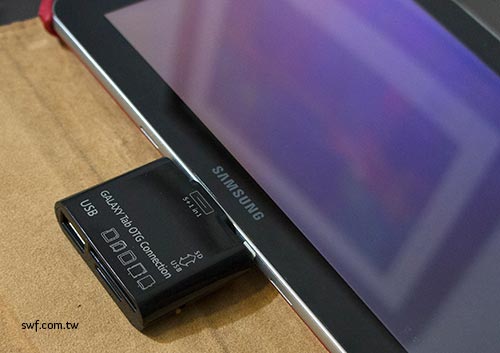
    5-in-1 USB memory card reader

    I don’t like the design of those cables, all I need is a small memory card reader after all. So I took apart of those cables. Here is the inside look of a Galaxy Tab USB charging cable:
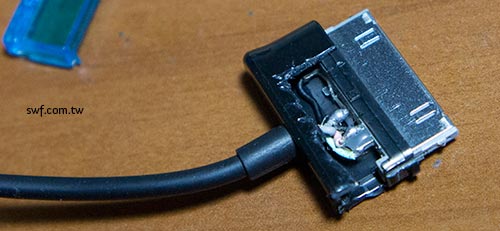
    Galaxy Tab USB charging cable

    And here is an inner view of an USB OTG cable, there is a 20KΩ resistor solder on pin 13 and 15.
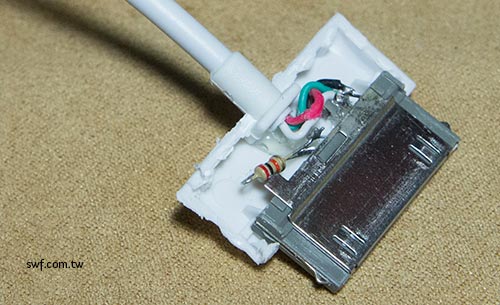
    USB On-The-Go (OTG) cable

    Tiny USB micro SD card reader disassembled

    This is the most tiny USB micro SD card reader that I could find on local market:
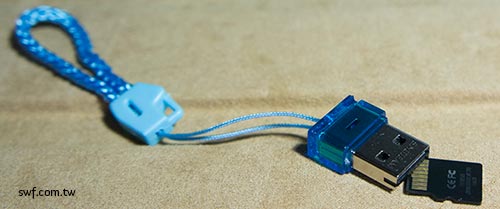
    tiny microSD reader

    The inside look of the tiny micro SD card reader:
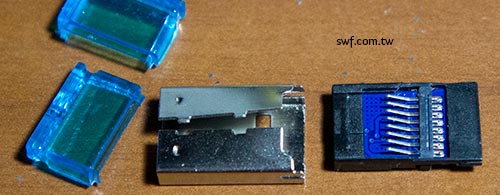
    inner view of the tiny microSD reader

    And the other side:

    the other side of the tiny microSD reader

    I desolder the 30 pins USB OTG connector, and soldered it with the tiny USB micro SD card reader. It works!
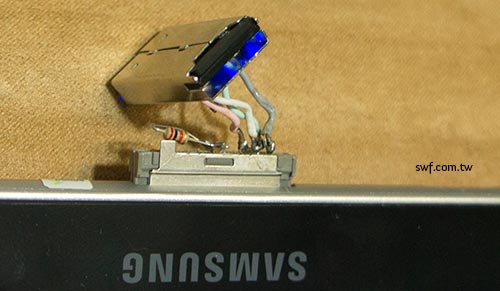
    testing the tiny microSD reader

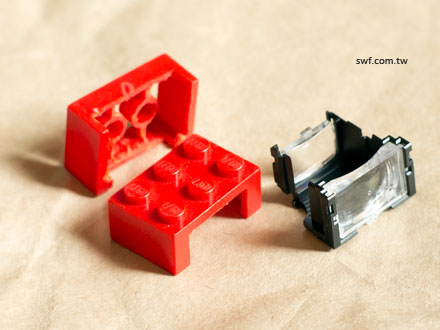
    Then, I hollowed out a yellow LEGO brick, but I soon I found the height of the components are 2 mm higher than a LEGO, therefore, I cut a 2 mm height red LEGO brick.

    LEGO microSD reader parts

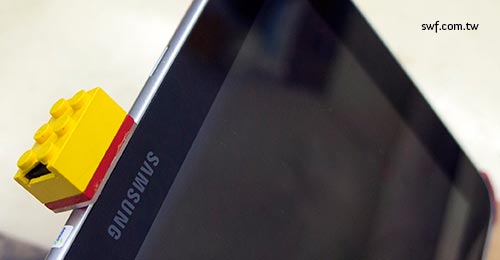
    Here is the final look of the LEGO micro SD card reader for Samsung Galaxy Tab:
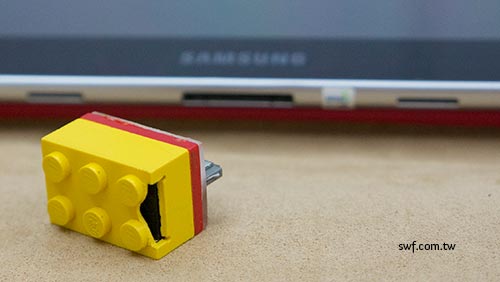
    a custom LEGO microSD reader

    The thin blue light come out from the bottom.
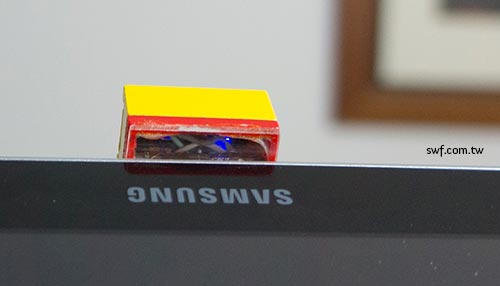
    blue light came from bottom of the LEGO brick

    The top view:

    top view

    Compare its size with a 5-in-1 USB memory card reader:
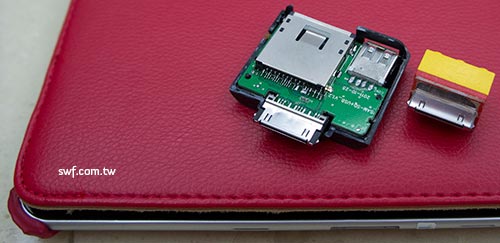
    compare the size of LEGO microSD reader with a USB memory card reader

     
  • cubie 5:59 am on August 3, 2011 Permalink | Reply
    Tags: , ,   

    Open source Sony camera IR shutter and time-lapse controller (updated version 1.1.0) 

    Editor: Jim kajpust

    I’ve updated the open source camera IR remote controller app for Android smartphones to version 1.1.0. This update adds these features:

    • Timer settings will be kept between control modes.
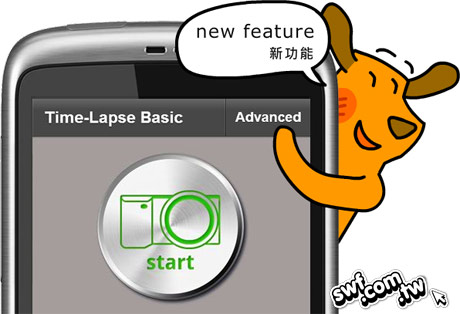
    • Add a new “Long exposure time-lapse” mode.
    • Add a splash screen (i.e. the start-up screen.)

    You can download the complied EVILRemote.apk file and optionally download the .fxp source code (.zip compressed) made with Adobe Flash Builder 4.5.1.

    Please note this app does not support every Android smartphone. For more information about supported phones and installation procedures, please refer to “Open source Camera IR shutter and time-lapse controller for Android smartphones” .

    This app was made for the Sony NEX 5 camera, however, the IR remote signal format used in Sony A55, A580, A390, A33 and NEX 5 cameras should be the same. That means you should be able to use this app to control those cameras.

    About the “Long exposure time-lapse” mode

    A new Long Exposure setting is added to the Time-lapse mode, so the camera can takes a series of long exposure pictures.

    To enter the “Long exposure time lapse” mode, press the “Advanced” option on the top-right corner of the Time-Lapse mode screen.

    press the “Advanced” option on the top-right corner of the Time-Lapse mode screen

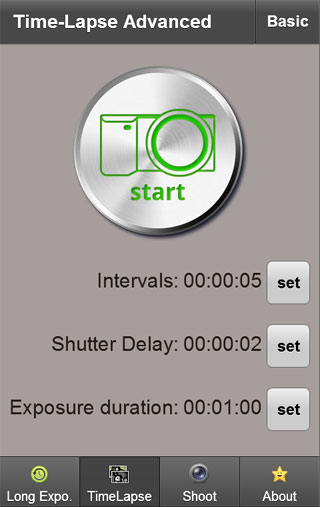
    The screen will slide into advanced setting mode. Press any of the “set” buttons to adjust timing.

    the screen of “Long exposure time-lapse” mode

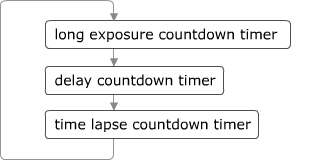
    Here is the work-flow of the “Long exposure time-lapse”:

    “Long exposure time-lapse” work-flow chart

    The camera may needs some time to process the long exposure pictures (for instance, get rid of noises), and it can’t accept any command during the process, so the remote controller has to wait for a while to send another command.

    Splash screen with Escher’s Droste effect

    Here is the splash screen for this app:

    Splash screen with Escher's Droste effect

    The splash screen is not necessary, but the Escher’s Droste effect looks pretty cool, so I made one by using a free Droste filter provides by Tom Beddard. The Droste filter is made with Adobe Pixel Bender technology, and the filter is compatible with Adobe Photoshop and After Effects (version CS4 and above).

    You can find more interesting Escher’s Droste effect pictures in Tom Beddard’s subblue website.

     
  • cubie 2:17 am on July 10, 2011 Permalink | Reply
    Tags: , , ,   

    Open source Camera IR shutter and time-lapse controller for Android smartphones 

    Editor: Jim kajpust

    In order to control my Sony NEX-5 camera through the IR transmitter from my Android phone easily, I created a simple IR remote controller and named it “EVILRemote”. It’s an open source project for which you can download the Android installer (.apk) and the source code.

    You can replace the IR signal sound wave file in the source code with others to control any other camera or device with IR remote capability.

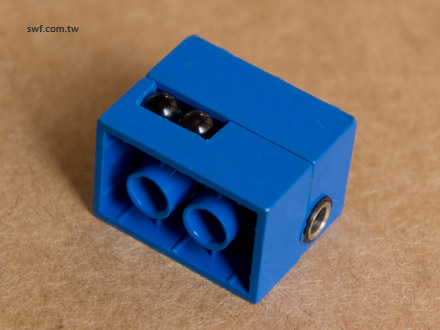
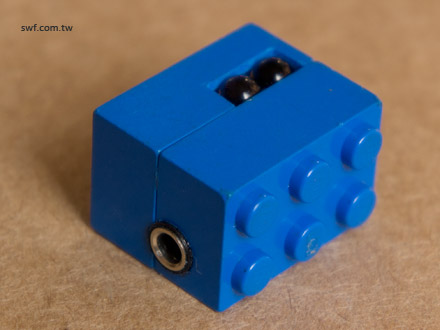
    To control your Sony NEX-5 or other compatible camera with this app, you need a IR transmitter that uses the headphone jack, which is easy to build by yourself (or you can purchase one). Here is what my  IR converter looks like:

    IR transmitter in a LEGO brick

    For more information on building your own IR converter, please refer to my blog article  “Create a LEGO IR Remote Transmitter with headphone jack for Sony NEX-5”.

    System Requirement

    • Smartphones with Android system 2.2 (Froyo) or higher.
    • Adobe certified smartphones with screen resolution 480 x 800 pixels; however, it should work on 320 x 480 screen.
    • Adobe AIR run-time app which is freely available on Android Market.

    Note: I only tested EVILRemote on following Android smartphones:

    • HTC Desire
    • HTC Desire HD
    • Sony Ericsson Xperia PLAY
    • LG Optimus Black P970

    Features

    Basically, EVILRemote is a countdown timer app with an IR signal wave transmit function.

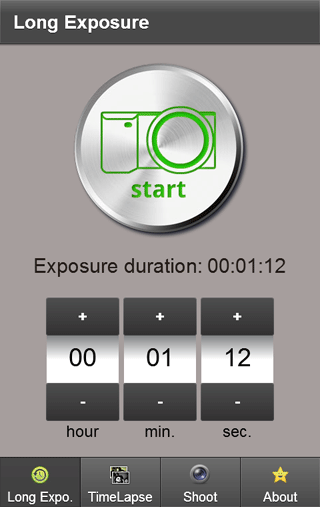
    • Long Exposure:contains a timer setter and a Start/Stop toggle button. After setting the timer and pressing Start button, it will transmit an IR signal immediately to start the long exposure process. When countdown time’s up, it will fire another IR signal to stop the long exposure.

      If you press Stop button before time’s up, a confirm message will pop up on the screen. If you press ‘OK’, it will fire an IR signal to stop long exposure.

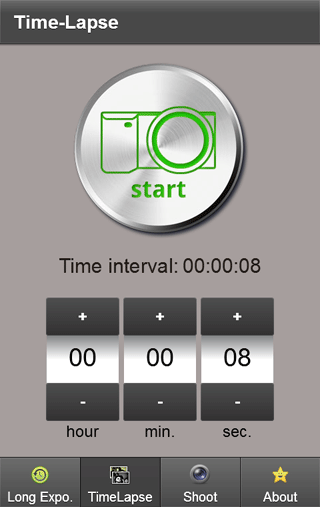
    • Time-lapse: after you press the Start button, it will transmit the IR signal repeatedly until you press the Stop button.

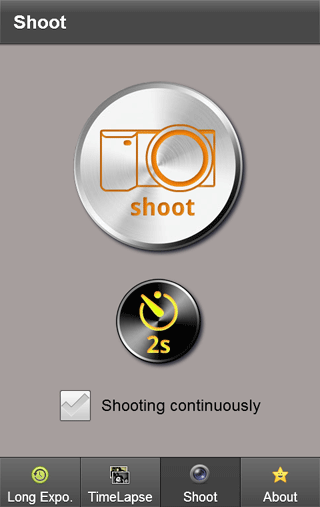
    • Shoot: provides a normal shoot and 2 seconds delay shoot mode.

    Download EVILRemote installer and source code

    I didn’t submit the EVILRemote app to Android Market yet, but you can download the .apk installer file here.

    To install the EVILRemote.apk manually, you can copy the .apk file to your Android phone’s SD card, and go to Settings -> Application Settings and enable Unknown Sources on your Android phone.

    EVILRemote app is made with Adobe Flash Builder 4.5, here is the source code in Flex .FXP format (ZIP compressed). You can download a trial version on Adobe’s Flash Builder product page, or request a free copy of this tool from Adobe Education website.

    If you modify or improve the function from the source code, please also share it to public.

    Credits

    The Photos and Camera Lens icons used in this app came from PixeloPhilia2 icon set created by Omercetin, which is available on the deviantart website.

    Photos and Time-lapse icon
    Camera Lans icon

    The Time Machine and Smiley Star icons below are part of Developpers Icons created by Sekkyumu, which is available on the deviantart website.

    Time machine and backup icon
    Smiley Star icon

    The above icons are also included in the app source code. Thanks to these graphics designers for making such gorgeous icons!

    This app also uses Android UI Components for Flex 4.5 created by John Olson. These components ease building the user interface of mobile applications. And finally, special thanks to my friend Jim Kajpust who reviewed and edited the content of this app and my English blog.

     
  • cubie 6:50 am on July 9, 2011 Permalink | Reply
    Tags: , ,   

    Create a LEGO IR Remote Transmitter with headphone jack for Sony NEX-5 

    Editor: Jim kajpust

    I made an IR remote controller for NEX-5. Here is the picture:

    IR transmitter in a LEGO brick

    It’s actually a “sound wave to infrared signal converter“. Before using it to control the NEX-5, you’ll have to “record” the IR signal and convert it into a sound wave. For more information about the IR recording process, please read this blog: “World’s cheapest remote control replicator: just 1$ !’ by jumpjack“.

    IR transmitter in a LEGO brick

    I’ve already recorded the shutter release and the 2 second delay shutter release signal in WAV, AIFF and MP3 format (here is the zip compressed file). You can play back the sound file from any MP3 player, iPod/iPhone/iPad, Android phone, PSP,… to control your NEX-5.

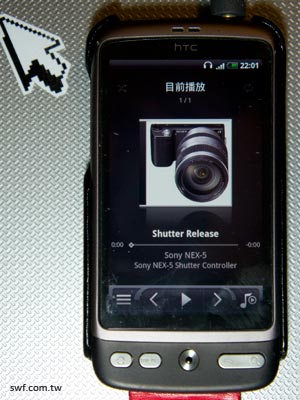
    Here is how the sound file looks like on the HTC Desire android phone:

    use android phone to control Sony NEX-5

    Of course, this “controller” can be used to control almost any IR device, as long as you have the proper IR signal in sound wave format.

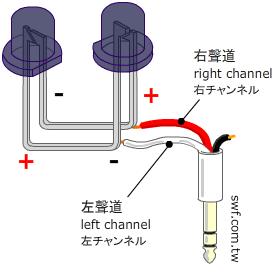
    The schematic of the IR transmitter with  headphone jack is pretty simple, you only need two IR LEDs ( I got those from old remote controllers), and one stereo audio plug or jack:

    IR Transmitter schematic

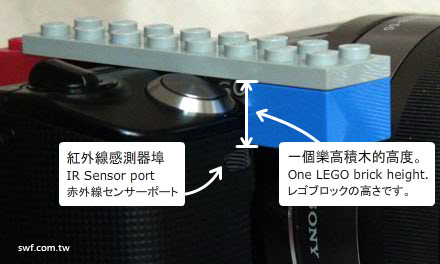
    By the way, there’s a problem with the IR port. If someone nearby is using a remote controller, your device might also react to the controller. That’s not good. Therefore, I think it’s better to make sure your controller is the only one that is commanding the device. My solution is simple: use a LEGO brick to cover the IR port, so it will not be interfered by other controllers.

    Fortunately, the IR port on NEX-5 is just about the height of one LEGO brick:

    IR transmitter holder construction

    We can put the IR LEDs below one brick, that’s the exact location of the IR sensor.

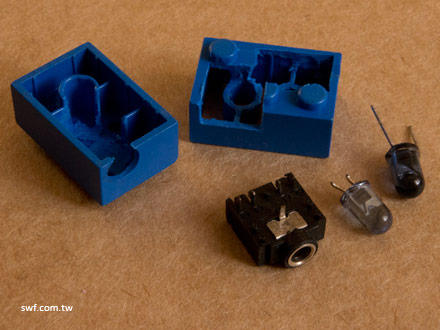
    Here are the parts I use:

    IR transmitter parts

    Here are the construction steps:

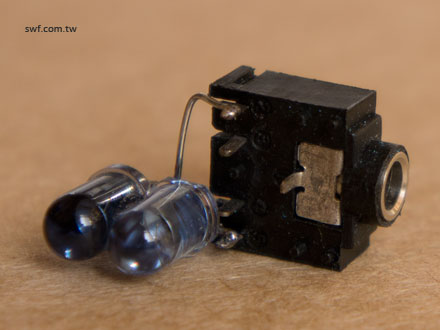
    Solder the IR LEDs to audio jack:

    Solder the IR LEDs to audio jack

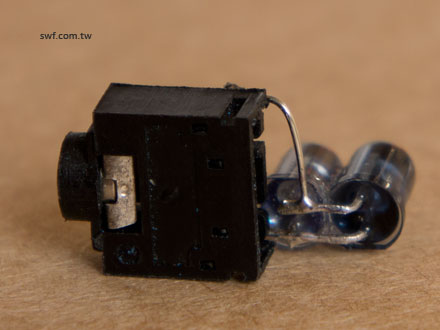
    The other side view:

    Solder the IR LEDs to audio jack

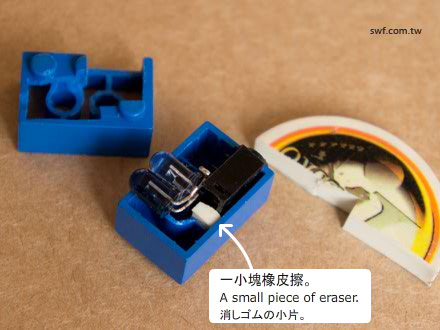
    Put them into one brick and stuff a small piece of eraser into the empty space behind the audio jack.

    Put IR LED and audio jack into LEGO brick and stuff a small piece of eraser into the empty space

    Finally, connect a stereo cable to the LEGO IR controller and MP3 player or a countdown timer application.

    IR transmitter in action

    Here is the rear view of the construction:

    IR transmitter in action

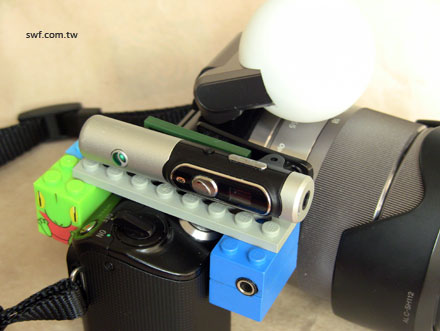
    I tried to connect the IR controller with a stereo Bluetooth headset to control NEX-5 wireless; however, it doesn’t work :-(

    IR transmitter with bluetooth receiever

    The ping pong ball diffuser is a replica of the idea from virodri in dpreview foruum, and it works great!

    A simple Time-lapse solution and Long Exposure solution

    If you want to take a series of time-lapse photos, such as taking photos every 5 seconds, you can use a Sound Editing tool, like the free and open source Audacity, to add 5 seconds of silence (no sound) at the end of the IR sound wave.

    After that, use your MP3 device to loop-play the sound wave… tadaaa, you just made a time-lapse remote controller!

    For a long exposure, just set the alarm clock sound effect of your iPod or mobile phone to the IR wave file.

    And finally, I’ve made a EVILRemote controller for the Android phone (Android 2.2 and above is required) which has to use with is IR device. The app is free and open source and you can compile the source code into iPhone / iPod touch app.

    Have fun!

     
  • cubie 2:17 pm on July 8, 2011 Permalink | Reply
    Tags: , , viewfinder   

    DIY a LEGO viewfinder for Sony NEX 5 camera 

    Editor: Jim kajpust

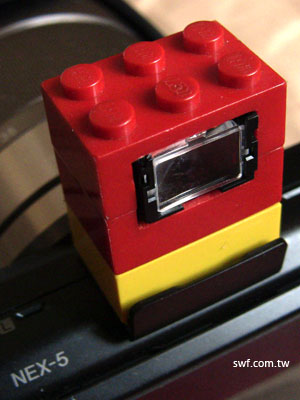
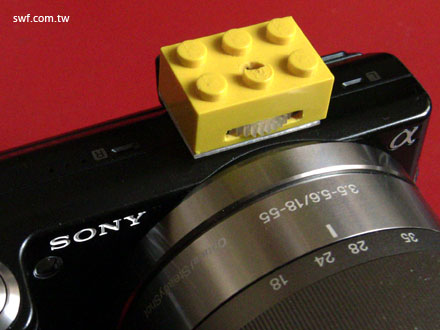
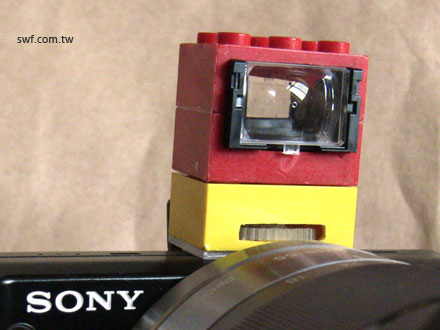
    I made a viewfinder by using components from a disposable camera, CD-ROM driver and some LEGO bricks. Here is the result:

    LEGO View Finder for Sony NEX-5

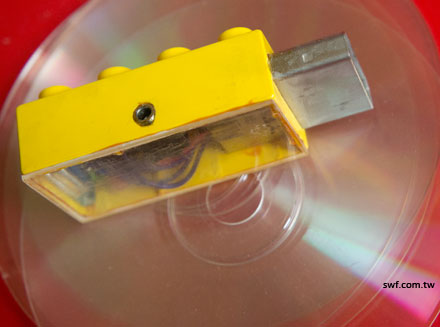
    The viewfinder body is composed by three parts:

    LEGO view finder parts

    Here is the view of the assembled viewfinder parts. I only use Scotch tape, rather than glue, on both sides of LEGO to attach the top and bottom parts, in case I need to disassemble the viewfinder to clean or replace the lenses in the future.

    view finder assembled

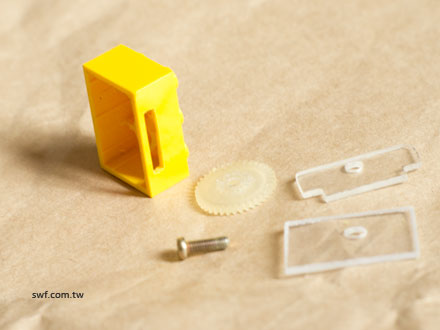
    Here are the parts for the base. The bolt and gear (dial-wheel) came from an old CD-ROM driver.

    view finder base parts

    The clear plastic parts are cut from the clear plastic cover of a CD-ROM or DVD holder. I also use the same plastic on my Xbox VGA converter project years ago, like this:

    clear plastic cover of a CD-ROM or DVD holder

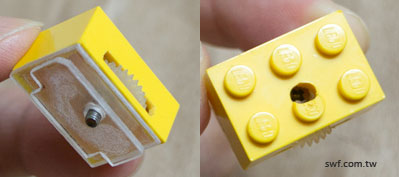
    The constructed custom hot shoe base for Sony NEX 3/5 series looks like below. I drilled a small hole on the top of LEGO, so that if the dial-wheel failed, I can use a screwdriver to attach or detach the custom hot shoe base.

    Sony NEX view finder base

    Here is how it looks when attached to the NEX-5 body:

    attatch the base part to Sony NEX-5

    This is the front view of the LEGO viewfinder and the base part:

    front view of the LEGO viewfinder and base part

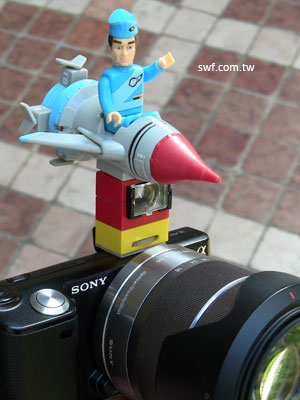
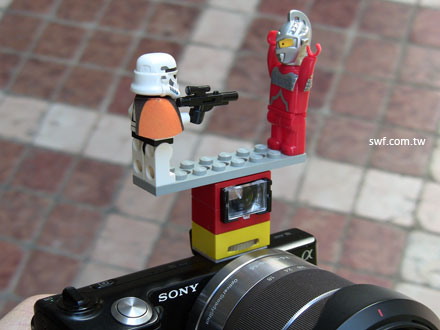
    You can put any extra LEGO part above the viewfinder, if you really want to do so 😀

    Thunderbirds are Go!

    Of course, I don’t really put anything on top of the viewfinder.

    LEGO Star Wars Stormtrooper and Japanese Ultraman

     
c
Compose new post
j
Next post/Next comment
k
Previous post/Previous comment
r
Reply
e
Edit
o
Show/Hide comments
t
Go to top
l
Go to login
h
Show/Hide help
shift + esc
Cancel